There has been a spate of burglaries in our area recently; thieves coming in over flat roofs in order to break into houses via the patio windows. We were burgled in this manner last November and have since taken some steps to make our house less attractive to thieves.
Firstly we installed a burglar alarm system, with sensors on all the windows and doors, and motion sensors in several of the rooms and hallways. This is a big visual deterrent but I wanted to address the issue of potentially identifying any individuals involved in thefts. When a chap two doors down was burgled a couple of weeks ago, the police officer asked if we had any CCTV footage they could access and my answer was no but it did get me thinking.
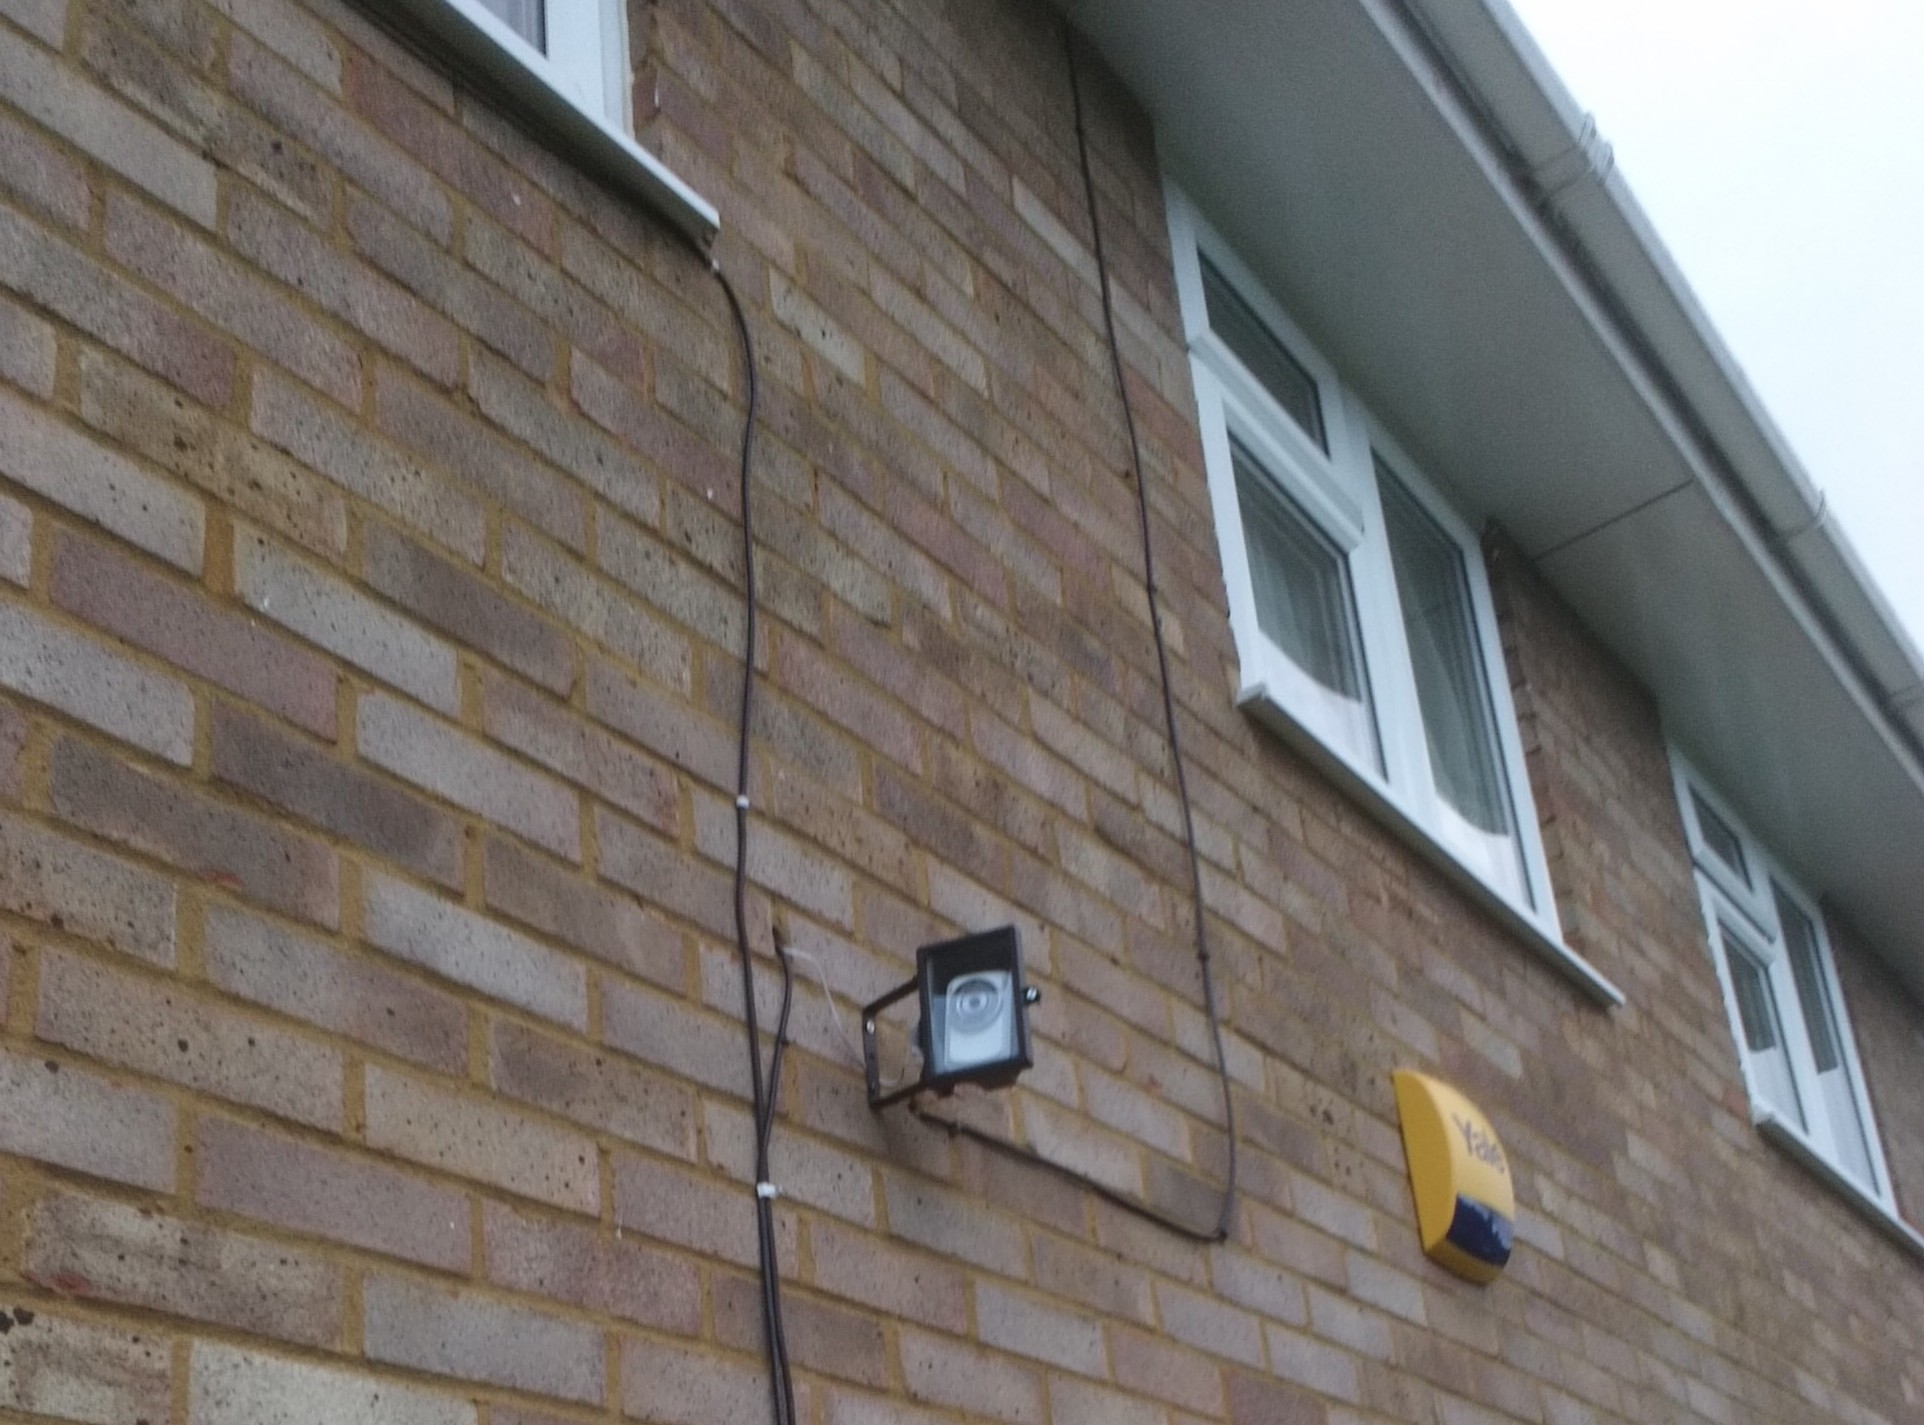
Wireless IP cameras with night vision aren’t expensive any more, and I identified the D-Link mydlink DCS-932L as a potential purchase at £29.99. I decided to purchase three- one for our living room and couple for the garden. Ebuyer sent them quickly and I was impressed with the size of the devices- about the size of an old Sony Clie PDA and very light.
 The astute among you might have noticed that these are indoor cameras and I intended to put two of them outside. If you want an outdoor camera, expect to add £100-£200 to the cost of your purchase. Fortunately the internet is awash with DIY solutions using various different housings. After a bit of looking around, I decided that I would make an external housing for my cameras using a Homebase Value 150W external floodlight. This cost £6.
Stripping out the light fitting of all the light stuff was relatively easy and only required a Philips head screwdriver. Once I’d stripped out the innards, it proved to be a near perfect fit for theD-Link DCS-932L , any bigger and it would have rattled around, any smaller and it wouldn’t have fitted.
A lot of the instructionals I read went to great effort to sit the camera in a foam mounting. I didn’t do this, I simply elected to put a couple of sachets of silica gel behind the camera to absorb any moisture that might gather. This basically had the added benefit of packing the case out nicely. I have read if temperatures get exceptionally low, foam packing helps retain the heat the camera generates to keep it operational, so it might be something I look at in the depths of winter.
In terms of wiring it in, I had to cut the power cable to get the cable through the fitting on the housing and through the side of our house. I already have a hole in our bedroom wall for FreeSat cabling, so I was able to poke it though that. The connector that comes with the light fitting for wiring in the mains cabling isn’t small enough to hold the PSU wires, so I scavenged one from a ceiling rose.
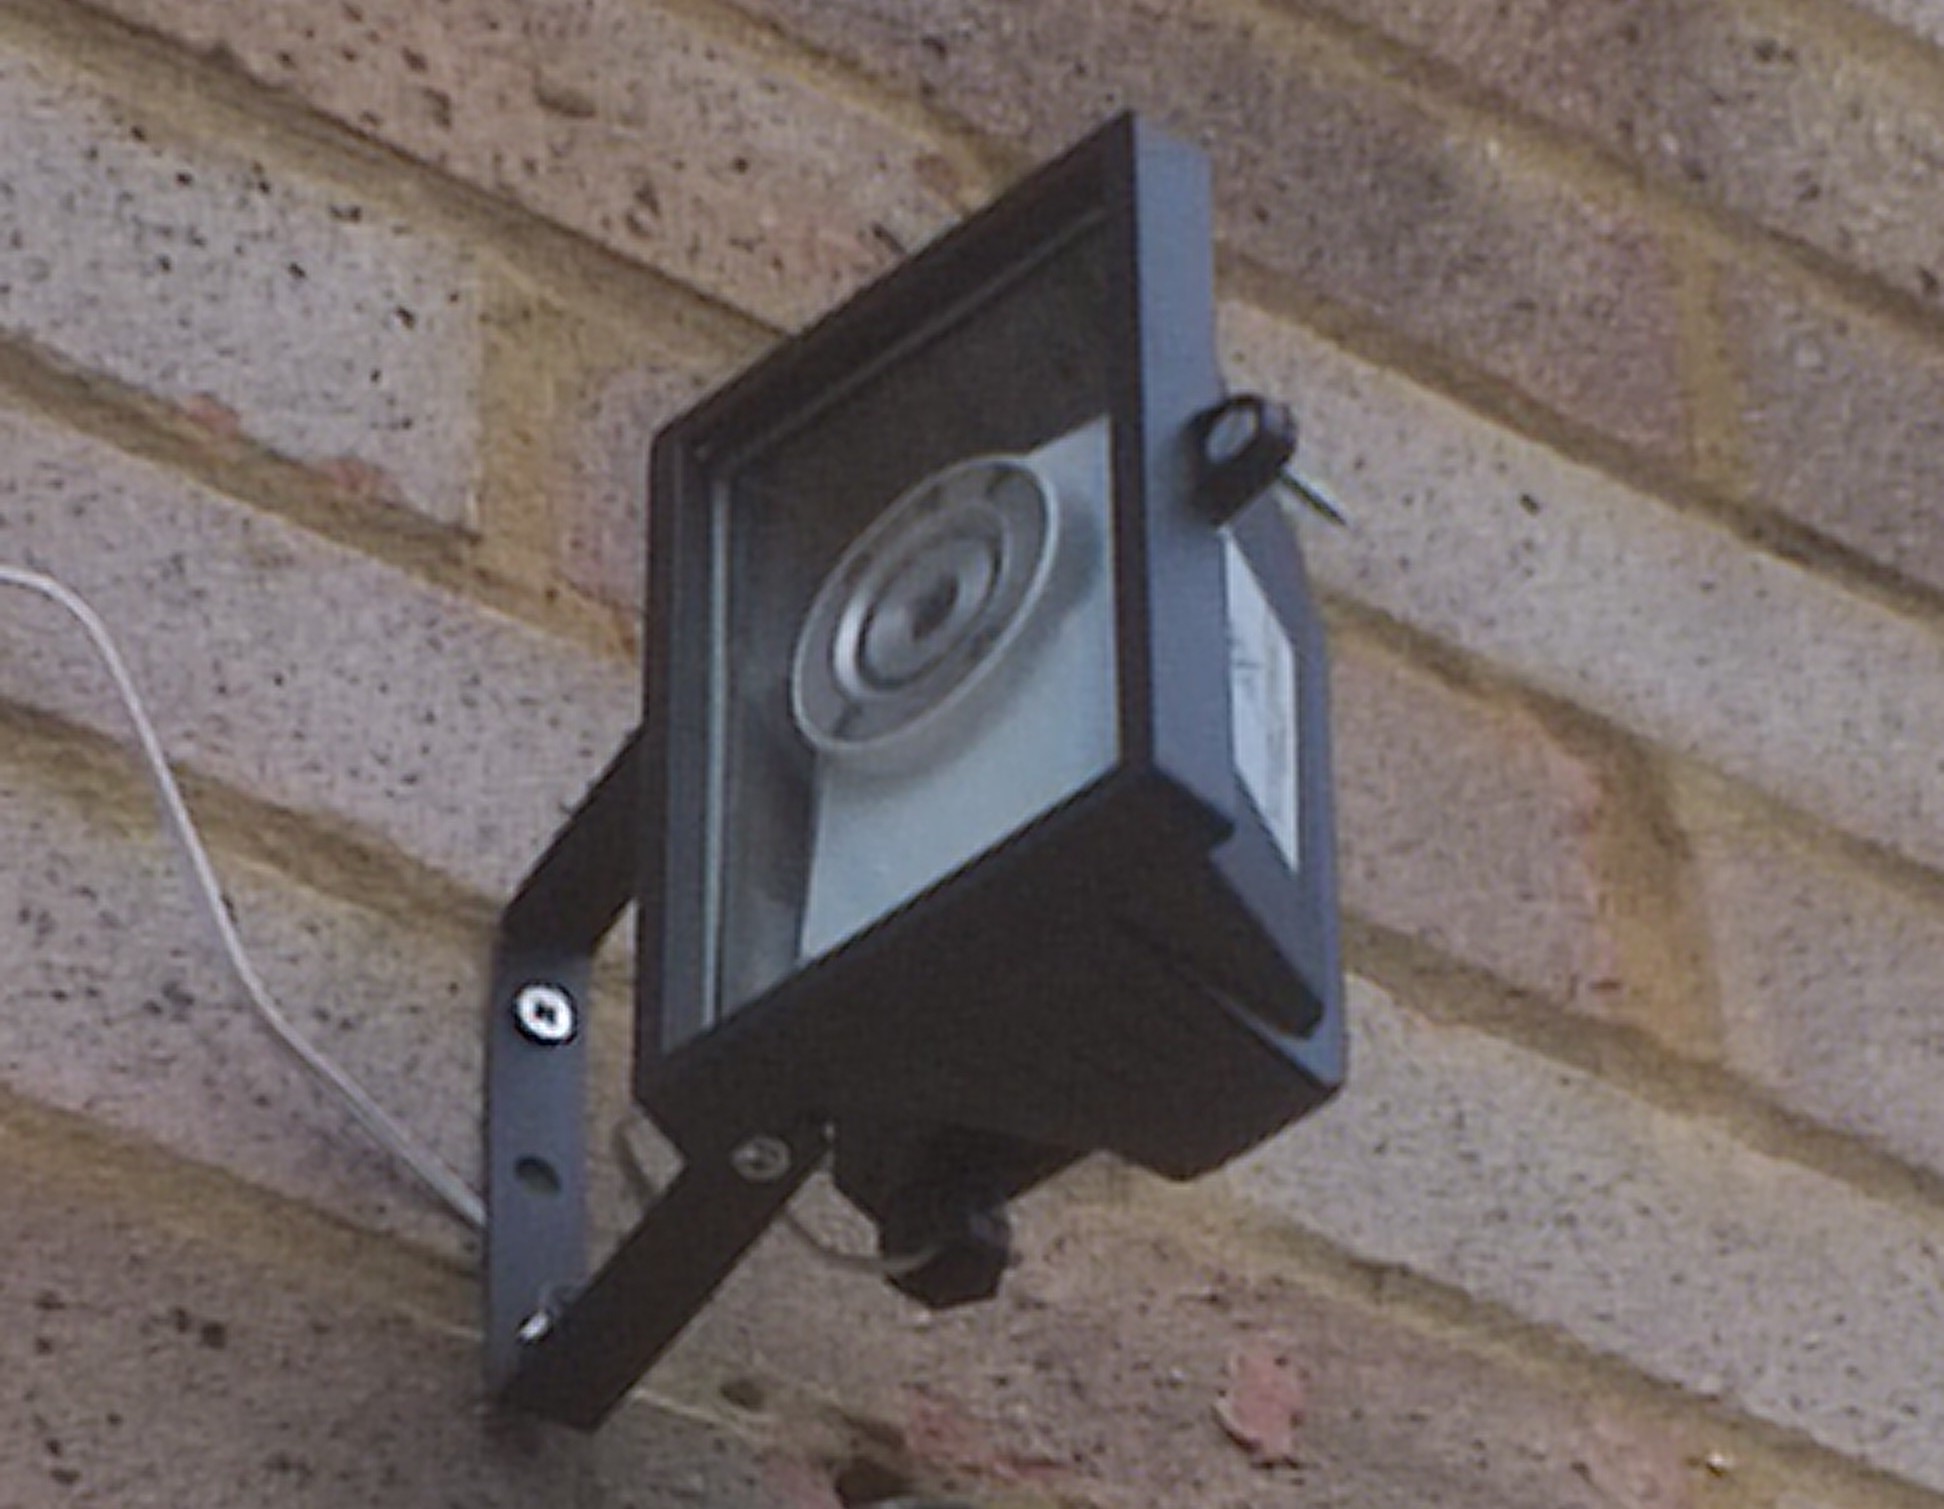
I was slightly concerned that the WiFi wouldn’t work because of the aluminium enclosure and I’d have to dig out my crimping tool to wire a ethernet cable into the enclosure but my fears were unfounded. The camera does need to be plugged in via ethernet initially to set it up, so it’s worth doing this before any custom wiring job but once it was up on the wall, the WiFi was rock solid.
The camera does come with it’s own mobile app, which is good for looking at but not great for security monitoring. It also comes with an excessively clunky desktop programme which I tried before switching to iSpy Connect. I have a camera set up at the front to monitor traffic/people coming into our close, and two out the back covering the flat roof and other points of ingress into our garden. The iSpy software is pretty easy to set up; some of the alerts cost a subscription but since it’s in AUS$, I thought I’d give it a try. I have the server software on a NUC box that uses a paltry 5W PSU. It’s great to be able to set it to email me a screen grab any time there is movement on our flat roof (for example).